9 Proven Ways to Clean Up and Speed Up Custom Code - Squarespace

About once a year, I revisit all of the custom code sections of my Squarespace site, only to get overwhelmed by the amount of custom code that has been changed, added, or is no longer used on my live site. If you’ve found this article, I’m betting you are in a similar situation with your Squarespace site.
By following the best practices for writing CSS, adding descriptive comments to your code, minifying large blocks of code, removing unused code and plugins, and a few more tips we’ll cover in this article, you can easily maintain a speedy and tidy Squarespace code backend.
Here’s what we’ll be covering:
1. Fix code editor formatting
This tip is a short and simple one that will clean up your code editors. Sometimes, copying and pasting code or directly typing custom code into the Custom CSS editor, page header, and footer code injections can cause the formatting and indentation to be slightly off. This makes code harder to read and edit. To fix this, you can select all of the text in the respective editor (Ctrl + A on Windows, Cmd + A on Mac), and then format the text (Shift + Tab on Windows, Shift + Tab on Mac). See the results of this neat little trick below.
Before fixing the formatting

After fixing the formatting
2. Use Low Specificity CSS Selectors for Manageable Code
Making CSS selectors as simple as possible can speed up your website’s load time, as well as make your CSS way easier to read and edit.
Because the computing and compiling time of modern browsers are so fast nowadays, speed is much less of a concern when writing CSS; however, low specificity selectors have a much greater impact on code readability (how easy it is to read the code) and maintainability (how easy it is to edit and maintain the code), so it’s still an important topic to cover.
What are CSS selectors?
Selectors in CSS are how we target specific HTML elements for styling. The main CSS selectors include element selectors, based on the native element name (p, h1, h2, h3, a, span, etc.); class selectors, based on one or more given class attributes (.classNameExample); and ID selectors, based on one unique ID attribute (#idNameExample).
For an in-depth tutorial about finding and using CSS selectors in Squarespace, you might enjoy reading my article A Complete Guide to CSS Selectors in Squarespace 7.1.
What’s wrong with CSS selectors that are too specific?
CSS selectors that are too specific can cause sloppy code that is hard to read and edit properly, and it can cause problems when you try to write more code in the future. When you use highly-specific selectors all the time, it can creep up over time causing future overrides to not work. Ultimately, you end up fighting against your own code because there is not enough room for more specific CSS selectors.
If you’re a developer or web designer, I’m sure you’ve been in situations where you tried writing a CSS rule that theoretically should work, only to find that it is not being applied. Most likely, the CSS selector you used is less specific than a previously applied one, and therefore it is not being applied to the element. This is one of the problems that can occur with too many highly-specific CSS selectors.
Now if you have some experience with the !important tag, which basically overrides everything, you might be thinking, “I can just throw an !important tag here and be done with it!” WRONG! If you keep using this as a strategy for overriding previous CSS rules, you’ll eventually get to a point where you can’t write anymore code to style a specific element without getting even more specific with your code, at which point you can see how the sloppiness builds up over time.
If you need more practice figuring out how to go about writing low-specificity CSS selectors in Squarespace, I go into full detail about this very topic among other Squarespace CSS-related topics in The Functional CSS Course.
How to write simple CSS selectors
Low specificity selectors refer to CSS selectors that are as simple as possible. This means using minimal descendant selectors (select elements nested within an element) and chained selectors (select elements with multiple attributes or classes) unless absolutely necessary. I won’t bore you with the techy details too much, but because compilers read CSS from right to left, selectors that are less specific and targeted with class names and ID attributes tend to be faster than descendant and chained selectors, and they are also a lot easier to read by humans.
Squarespace developers have done an excellent job of making sure native elements are given specific class names. Let’s look at an example. In order to select all header menu items in Squarespace 7.1 templates, you would only need to use the class selector “.header-nav-item”, and if you wanted to only select header menu items that are folder dropdowns, you could use the class selector “.header-nav-item--folder” (see the first column). Both of these are shallow because they only use one level of specificity without chaining a bunch of unnecessary selectors. The CSS selectors in the second column achieve the exact same thing, but the only difference is that they are unnecessarily specific, which might make them a lot harder to read and slightly slower than the corresponding selectors in the first column.
| Targeted Element | Low Specificity | High Specificity |
|---|---|---|
| Header nav item | .header-nav-item | #header .header-nav-wrapper .header-nav-list .header-nav-item |
| Header nav folder item | .header-nav-item--folder | #header .header-nav-wrapper .header-nav-list .header-nav-item--folder |
Sometimes, using a parent or chained selectors are unavoidable, especially when you need to only target elements within a specific section, or maybe you only need to target certain elements that have 2 specific class names. See the following table for examples.
| Targeted Element | Specific Selector |
|---|---|
| All links in a page section (Squarespace 7.1) | [data-section-id="SECTION_ID_GOES_HERE"] a |
| All links in the footer (Squarespace 7.1) | #footer-sections a |
Worrying about using low specificity selectors for speed optimization is really not that big of an issue unless you are adding hundreds of thousands of lines of code, and considering Squarespace only allows 28,000 characters in the Custom CSS editor, speed and CSS probably won’t be an issue for you. This is simply a best practice that will keep your code looking much cleaner.
3. Add comments to your code
Adding comments to your code editor is one of the best ways of maintaining a clean code editor. Comments make it very clear what each block of code does and why it is important so that whoever else is reading or editing the code has a better idea of how to modify it.
Adding comments in Custom CSS
There are two ways to add comments to CSS code: multi-line comments and single-line comments, but because multi-line comments are notorious for cluttering up CSS, I will only be showing you how to use single-line comments. I would recommend using single-line comments as starting and ending tags of a block of code - this way, you know exactly where a block of code starts and where it ends. Here is what that looks like in action:
//Start: Make paragraphs blue
p {
color: blue;
}
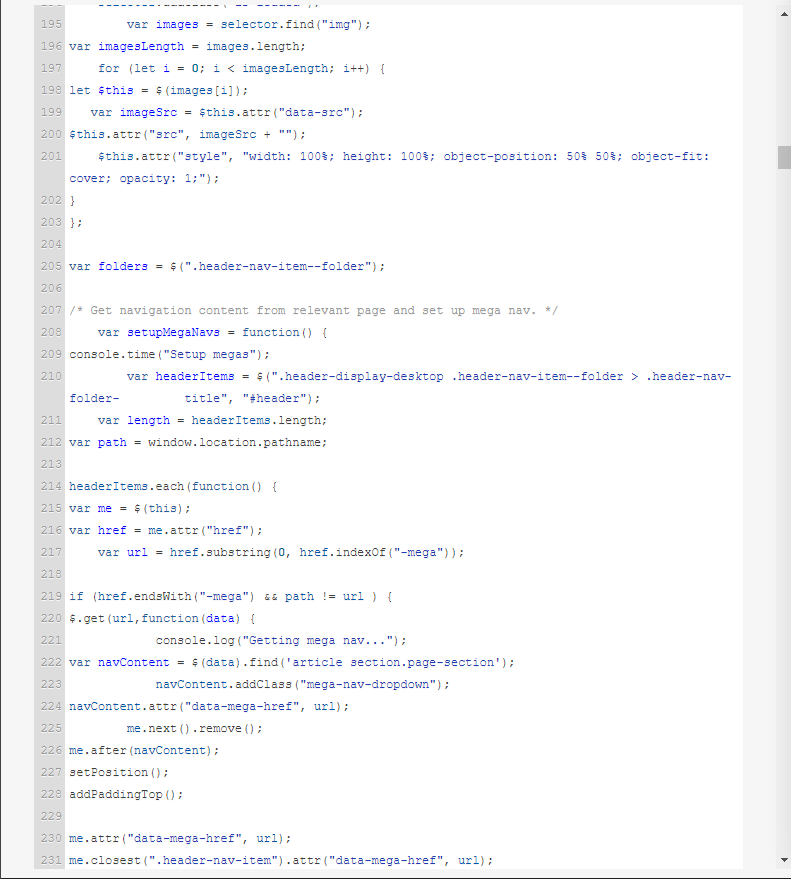
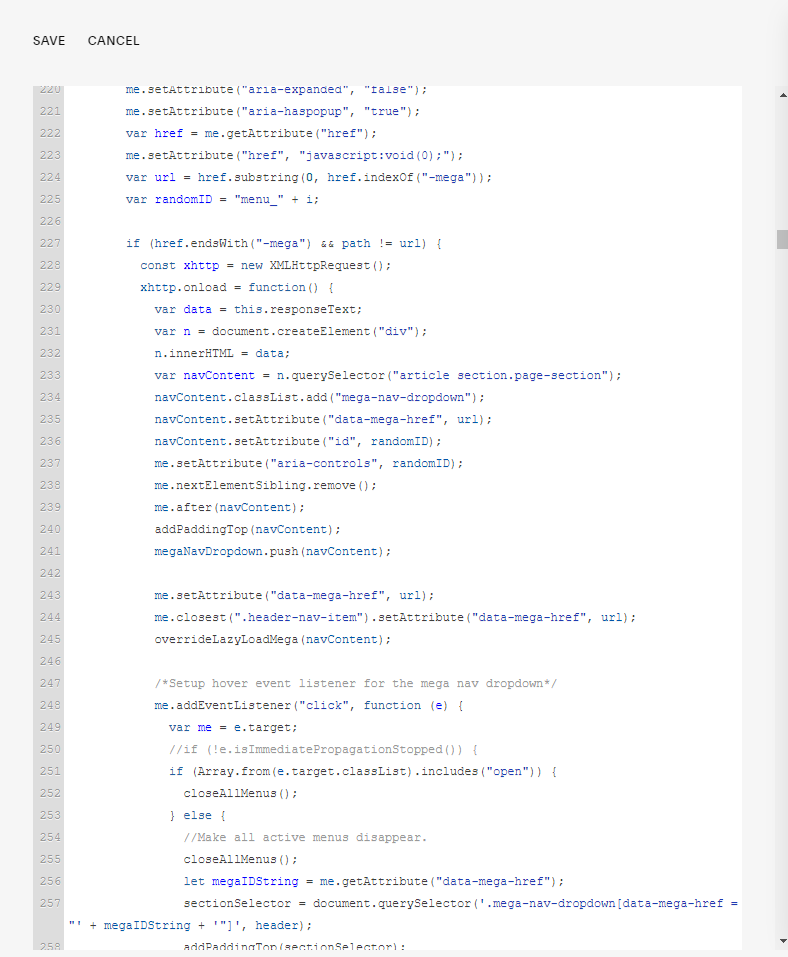
//End: Make paragraphs blueTo give you a better idea of the power of well-written comments, let’s look at the following examples. The image on the top is an example of the Custom CSS editor with comments written as start and end tags, and the image on the bottom shows the CSS editor with no comments. You can see how much easier it is to know which blocks of code do what in the top image. This gives you the ability to edit and delete code more confidently.

Custom CSS editor with well-written comments.

Custom CSS Editor with no comments.
Adding comments in header and footer code injections
Comments in the header and footer page code injections are a little different because the code placed in these areas are always placed inside HTML elements, including script tags <script> … </script> tags or style tags <style> … </style> tags. A comment surrounding HTML elements looks like the following:
<!-- This is the beginning of the code block -->
<script src="/link_to_script_file.js"></script>
<link href="/link_to_css_file.css">
<!-- This is the end of the code block -->
4. Use variables for more manageable code
Use CSS Variables in the CSS Editor
CSS variables allow you to declare CSS properties for static CSS rules. For instance, If you want to make all H1’s a certain color, you could declare a variable for heading 1 color; this allows you to use the variable in multiple CSS rules without the redundancy of using the same color multiple times, and it also makes it much easier to make changes to the code.
See the example code snippets below to see this in action.
Declaring and Using CSS Variables
@heading1Color: blue;
h1 {
  color: @heading1Color;
}
Here is a series of CSS variables used in the Mega Menu Plugin for Squarespace 7.1
5. Minify medium-to-large blocks of code
If you have inline JS and/or CSS code in your code injection header or footer that exceeds 400 lines, it might be worth it for you to minify those blocks of code.
The larger the code file, the longer it takes for it to load. It’s really as simple as that. The process of minifying code involves removing extra white space and comments so that computers can read the instructions faster.
The tradeoff is that it becomes harder for humans to read because we tend to like lots of whitespaces and formatted text. Because of this, most people will save a copy of their formatted CSS and JS code in a backup file.
Squarespace has a built-in feature that automatically minifies all CSS code in the Custom CSS editor of your site, so luckily we don’t have to do any extra work in the Custom CSS editor.
It does not, however, minify code in the header and footer injections or any external CSS and JS files you may have added, so if you have a particularly long CSS or JS block of code (more than a few hundred lines) in your page header, site header, or site footer code injections, you might consider minifying that code and saving a copy of the original, formatted version.
If the code in your code injection is not more than 200 lines of code, minifying it will do little to no good for speed so you can leave it as is. If you are using external files from a third-party plugin, the plugin creator will almost always minify the files for you, so don’t change anything!
Here are the only CSS and JS minifier tools that I use:
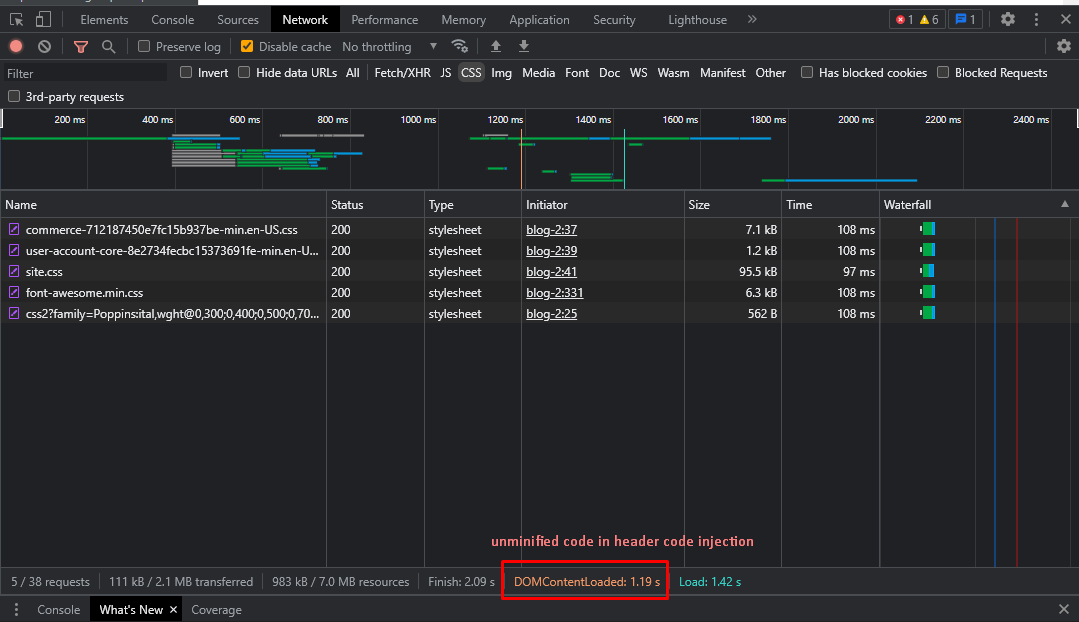
Slower: Un-minified JS code block in the site header code injection is 394 lines of code.

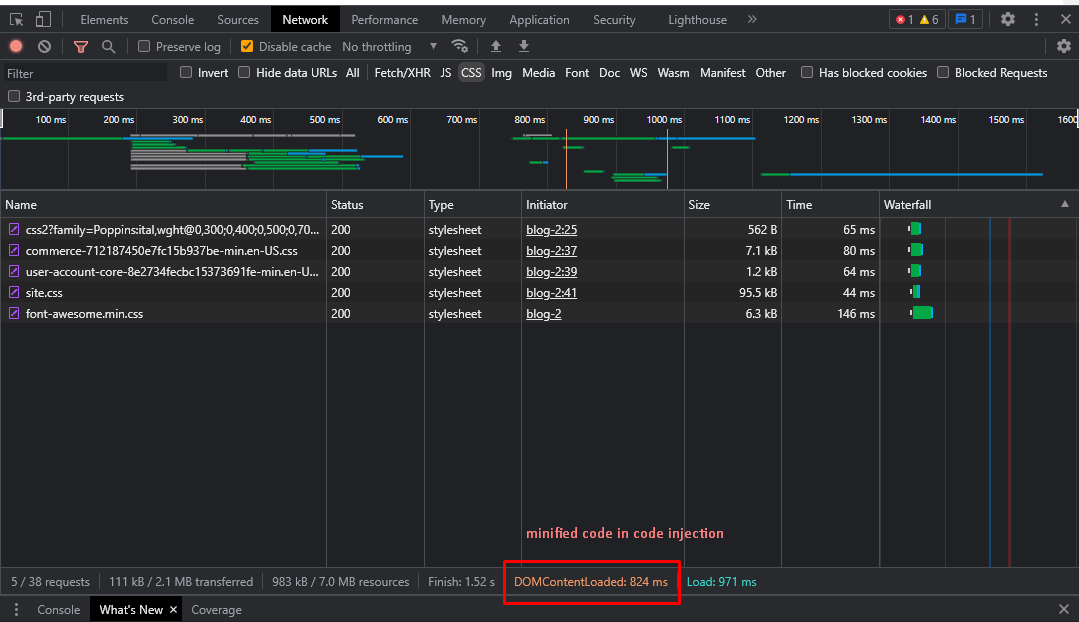
Faster: Minified JS code block in the site header code injection looks like multiple lines, but a computer will read it as only 1 long line of code.
Here’s a quick test I ran on my own site with a 1000-line block of JS code. The first image is the page load time with un-minified JS code, and the second one is the load time with the same code minified. The time difference is an average of ~366ms.
6. Remove unused code and plugins
As a web developer and Squarespace plugin creator, I’ll be the first to tell you that plugins and custom code can add great additions to your site if you have a need for them - I wouldn’t be using 3,000+ lines of code on my own site if I didn’t think so - but even I know that as your site continuously evolves, you might not have a need for a specific plugin or block of code anymore. If this is the case, remove them! Keeping unused code can unnecessarily slow down your site and can also clutter up the backend of your Squarespace site. Removing code from your site will be much less of a hassle if you made sure to follow my advice about using comments in your CSS code. This way you can be sure not to accidentally erase code that is still being used. If you think you may want to use this code in the future, you can add the clearly labeled code to a backup file on your computer or Google Drive.
7. Remove duplicate jQuery references
jQuery is a library used to shorten and simplify the amount of complicated code that plain JavaScript (also known as Vanilla JavaScript) requires. You may be using one or more plugins or code snippets on your site that require jQuery, but sometimes you could have inadvertently added it twice. This can cause your site to load about 50ms slower than if you had just added it once, so if you know you don’t need multiple versions, consider erasing the more out-of-date one.
Sometimes, however, deleting a reference to jQuery is not that simple, because you may have different code snippets or plugins on your site that each requires a specific version of jQuery. If this is the case, do not delete one version of jQuery unless you are also going to delete the code that requires it, otherwise, you could break your site. If you need help identifying if one of your jQuery versions can be safely deleted, you can follow a step-by-step guide here.
8. Move external JavaScript files to the footer
If your Squarespace site uses third-party plugins such as Font Awesome or Squarespace sepcific plugins, you might have added the file references to your site header via Code injection.
This is a perfectly acceptable way of adding files to your site and sometimes it is warranted, but there are two things to remember about adding external libraries to your site:
Adding library references to the header means the server will load and execute those before the web page is loaded. This means your website will take longer to load because it is attempting to load files before the page shows up, even if it’s only a few milliseconds longer.
Adding library references to the footer means the server will wait until after the page is loaded to start loading and executing the code in the footer. This means your site’s DOM content - the HTML elements on the web pages - will load faster for your site visitors, and then the scripts added in the footer will be loaded as soon as your web page is finished rendering.
Now, wait - before you start removing all references in your header to the footer, it is also important to remember that some code snippets and library references might be required in the header, so you shouldn’t move all of them unless you know what you are doing.
For example, the Squarespace 7.1 mega menu plugin available in my plugin store tends to do better loading from the header, because those plugins affect navigation - which is generally the first thing people see and use when they visit a site. Therefore, the code needs to be loaded immediately from the header. This is one example of a few extra milliseconds being worth it for a better user experience.
Also, if any of your third-party plugins and code snippets use the jQuery library, you should always make sure that the jQuery reference is loaded before all of its dependents, so I would recommend leaving jQuery references exactly where they are unless you are an experienced developer with troubleshooting skills.
That being said, there are some external files and plugins such as Font Awesome or plugins that affect the lower half of a web page that can generally can be loaded from the footer instead of the header without messing anything up. If you have questions about moving external files to your footer, you can ask me and I’ll try to help you out, or you can contact your third-party plugin creator to see if they can help you.
If the information in this article was a little overwhelming for you, don’t worry too much! I have been writing CSS, JavaScript, and HTML code as a front-end web developer for at least 5 years now, and every day I am still learning new things that level up my code writing skills. If you’re interested in learning and growing your skills with me, sign up for my email list so that you never miss an update or a Squarespace tutorial.
Now that you are officially a clean code-writing expert (because you’ve made it to the end of this tutorial), check my blog post 6 Helpful Squarespace 7.1 Code Snippets That Every Site Should Implement where I provide free code snippets that will improve the user-friendliness of your Squarespace 7.1 site.
9. Move internal CSS to the Custom CSS Editor
There are multiple ways of adding CSS to a Squarespace site, including page header code injection, site header code injection, footer code injection, Custom CSS editor, and code blocks.
Even though we have plenty of options, the best place to put CSS is in the Custom CSS editor, which is exclusively for Custom CSS. The reason for this is because when you use internal CSS to style your page, meaning CSS places inside of <style></style> tags, it actually increases your page size and can increase your page load time depending on how much internal CSS you have.
